
<div class="wp-block-codemirror-blocks-code-block alignwide code-block"><pre>#site-subheader
{display:none;}
<div class="wp-block-codemirror-blocks-code-block alignwide code-block"><pre>#site-subheader
{display:none;}
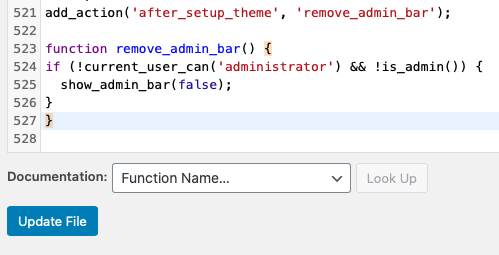
<div class="wp-block-codemirror-blocks-code-block alignwide code-block"><pre>add_action('after_setup_theme', 'remove_admin_bar');

function remove_admin_bar() {
if (!current_user_can('administrator') && !is_admin()) {
  show_admin_bar(false);
}
}
Sign in With Apple on WordPress.com
WordPress.com is the non-self-hosted version of the blogging and website-building software. Users who have sites built with that can now easily access their accounts using Apple’s login tool. Head Worpdress.com. Select the option labeled Continue with Apple:

The login process then asks you for your Apple ID and password.
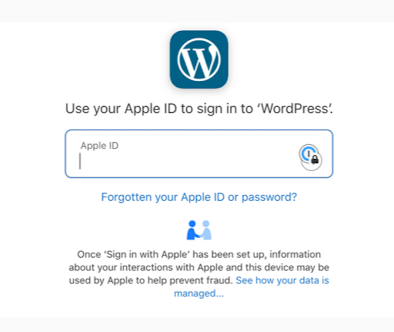
This should be a simpler, and more private, way of logging in to WordPress.com